Installing and configuring Offer Walls
Titan is the first script to introduce global support to all Offer Walls and CPA/GPT Networks. After it's properly installed and configured, you can use any Offer Wall with no extra management. All postbacks are handled 100% automatically.
We can't automatically add all Offer Walls to the script for one simple reason: every Offer Wall configuration is unique and it depends on the account you create in every Offer Wall provider. That is why we wrote tutorial how to integrate each Offer Wall provider into your Titan script.
Contents
Universal installation process
Yoy need to complete this process for every Offer Wall you want to install.
Preparation
Create new Offer Wall
Go to Admin Panel → CPA/GPT → Offer Walls → Add new and click "Add new, empty Offer Wall" button. After you click the button, you should see a success message. Now return to Installed Offerwalls page. You should now see your newly created Offer Wall as "Awaiting setup..". Activate it.
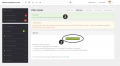
Adding new Offer Wall
Activating newly added Offer Wall


Edit the Offer Wall
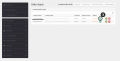
In Admin Panel → CPA/GPT → Offer Walls → Installed Offerwall click "See details and edit" button. You will now see Offer Wall summary page. To edit its settings, click "Edit Offer Wall" in the panel to the left.
Create the Offer Wall in the Offer Wall provider website
Open a new tab. Go to your Offer Wall provider website and create an account there. Next log into your account, and add new Offer Wall/application. Fill in all details and save.
Offer Wall HTML
Find your Offer Wall HTML on Offer Wall provider website and return to your Titan Admin Panel Offer Wall. Paste your Offer Wall HTML code into "HTML code" field. Make sure to replace current member username with [USERNAME] variable. Full list of supported variables can be found below:
| Variable | Description | Required |
|---|---|---|
| [USERNAME] | Username of currently logged in member | Yes |
| [REGISTERED] | Registration date of the member (unix timestamp) | No |
| [EMAIL] | Email of the member | No |
| [AGE] | Age of the member | No |
| [GENDER] | Gender of the member ('M', 'F' or 'U' if unknown) | No |
You can alternatively use %% instead of [], for example %USERNAME% will work the same as [USERNAME].
Postback
Postback variables
Go to your Offer Wall provider documentation and read postback documentation. Now return to your Titan Admin Panel and copy-paste all variables:
| Name | Variable should contain: | Required |
|---|---|---|
| Username variable | Username of the member who completed the submission | Yes |
| Points/money variable | Virtual currency (Points) or its money equivalent that should be credited to the member | Yes |
| Tracking Info variable | Tracking ID of the submission* | Yes |
| Credit type variable | Information whether the postback credits or reverses the submission | No |
| Signature variable | Additional security feature. Contains secure signature that signs every postback submission | No |
*Make sure that Tracking Info variable is unique for transaction and independent of its status (Tracking Info variable should be the same for credit & reverse). It can be for example an Offer Id. It's needed for Points Locking feature to work.
All variables support both: GET and POST. You can optionally (if required by Offer Wall provider) set "Successful response text". It is the text that will be returned if postback was successful.
Postback URL
Copy-paste your Postback URL from Titan Admin Panel to your Offer Wall provider website.
Restrict Postback IPs (optional)
For better security, it is recommended to restrict IP addresses that have access to your postback handler. Find IP addresses of your Offer Wall provider in their documentation (if there are any) and copy-paste them into "Whitelisted IPs" field. Make sure to check "Restrict Postback IPs" checkbox.
Test and finish
Save settings
Save your settings on both: Offer Wall provider website and Titan Admin Panel.
Test if your Offer Wall is displaying properly
Go to your Titan Website → Menu → Earn → Offerwall and check if your Offer Wall is being displayed properly. Please note that some providers require approval before they allow displaying their Offer Wall.
Test Postback
Go to your Offer Wall provider website and find test postback feature. Enter example variables and test:
- Username: admin
- Amount: 10
Now return to your Titan Admin Panel and go to Postback Log. If everything has been configured properly, you should see your test postback record with status "CreditedByOfferwall". Congratulations! Your Offer Wall has been installed and configured properly.
Installing particular Offer Wall providers
Before you read this section, please first read Universal installation process above. You will basically have to complete this process for every provider listed below. It just differs on some points.
Super Rewards
See Installing and configuring SuperRewards Offer Wall