Installing and configuring ClixWall Offer Wall
This tutorial will guide you through the process of integrating ClixWall Offer Wall into your website.
Contents
Preparation
Create new Offer Wall
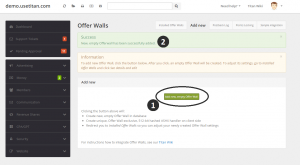
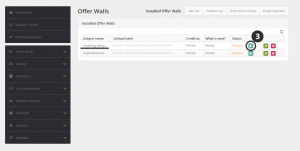
Go to Admin Panel → CPA/GPT → Offer Walls → Add new and click "Add new, empty Offer Wall" button. After you click the button, you should see a success message. Now return to Installed Offerwalls page. You should now see your newly created Offer Wall as "Awaiting setup..". Activate it.
Edit the Offer Wall
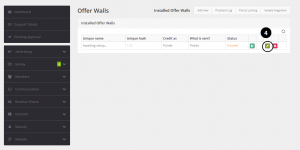
In Admin Panel → CPA/GPT → Offer Walls → Installed Offerwall click "See details and edit" button. You will now see Offer Wall summary page. To edit its settings, click "Edit Offer Wall" in the panel to the left.
Create the Offer Wall in the Offer Wall provider website
Open a new tab. Go to http://clixwall.com/register.php and register as a Publisher. Next log into your account, and go to Your Apps → New App. Fill in all details:
| Field | Value | Example |
|---|---|---|
| The name of your app | Up to you | MyWebsite |
| Type | Web | |
| The URL of your app | Your website URL | http://mywebsite.com |
| Currency name | Your website virtual currency name. Should be the same as in Admin Panel → Money → Currency → Virtual currency | Points |
| Currency value | Your website virtual currency value. Should be the same as in Admin Panel → Money → Currency → Virtual currency | $1 = 1000 Points |
| Postback URL | Copy-paste from Titan Admin Panel |
Offer Wall HTML
Find your Offer Wall HTML on Offer Wall provider website and return to your Titan Admin Panel Offer Wall. Paste your Offer Wall HTML code into "HTML code" field. Make sure to replace current member username with [USERNAME] variable.
The HTML code should look something like:
<iframe src="https://wall.superrewards.com/super/offers?h=qwertylxvcp.23498734876&uid=[USERNAME]" frameborder="0" width="728" height="2400" scrolling="no"></iframe>
Full list of supported variables can be found below:
| Variable | Description | Required |
|---|---|---|
| [USERNAME] | Username of currently logged in member | Yes |
| [AGE] | Age of the member | No |
| [GENDER] | Gender of the member ('M', 'F' or 'U' if unknown) | No |
Example of HTML code with additional parameters:
<iframe src="https://wall.superrewards.com/super/offers?h=qwertylxvcp.23498734876&uid=[USERNAME]&gender=[GENDER]&age=[AGE]" frameborder="0" width="728" height="2400" scrolling="no"></iframe>
Crediting
CREDITING DESCRIPTION
Restrict Postback IPs
For better security, it is recommended to restrict IP addresses that have access to your postback handler. At the time of writing this article, the SuperRewards IPs are:
- 54.85.0.76
- 54.84.205.80
- 54.84.27.163
As the above may change, make sure to visit http://docs.superrewards.com/docs/notification-postbacks to find the up-to-date list.
Check the Restrict Postback IPs checkbox and enter the above IPs, seperated by a comma, into the Whitelisted IPs textbox.
Admin Panel variables
| Variable | Value | |
|---|---|---|
| Username variable | uid | |
| Points/money variable | new | |
| Tracking Info variable | id |


